Jack sewing article
How to Choose an Industrial Flat Bed Sewing Machine: A 5-Step Checklist
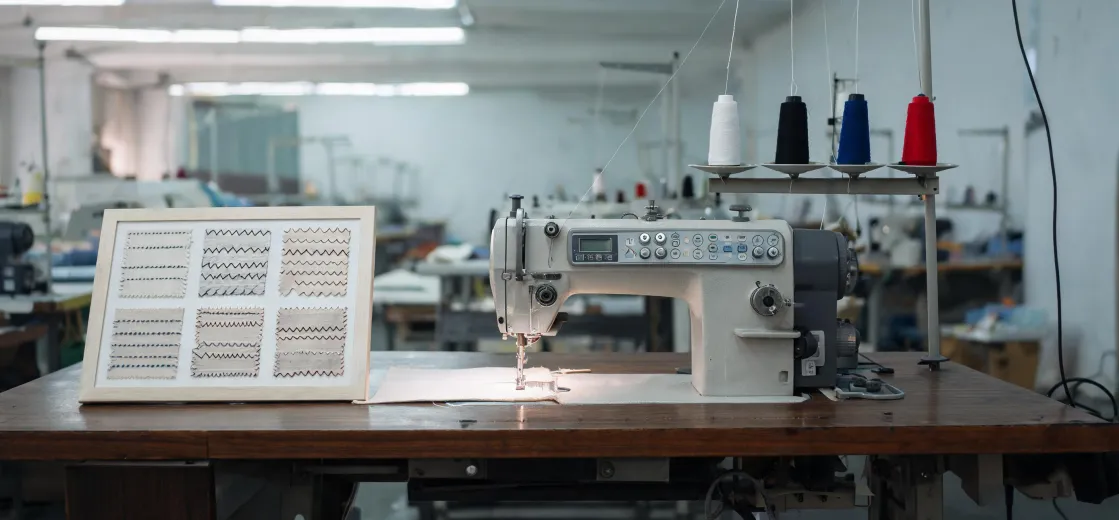
If you’re sourcing an industrial flat bed sewing machine for a production line, the decision can get overwhelming fast. You’re comparing specs, prices, and supplier promises, but the core question is simple: Which machine will keep your operation running with the least headache?
This checklist is for procurement managers and workshop owners who need a clear, step-by-step process. It won’t teach you everything about sewing technology, but it will help you avoid the most expensive mistakes. Here are the 5 steps to follow.
1. Match the Speed to Your Production Volume
The first filter is stitches per minute (SPM). A standard industrial flat bed machine runs between 3,500 and 5,500 SPM. If you’re doing high-volume garment runs, you need the higher end. For custom work or small batches, a machine in the 3,500 to 4,500 range is more than enough and easier to maintain.
Here’s a common mistake: Buying a machine with max SPM because it looks good on paper, but your operators can’t keep up, or the fabric starts slipping at those speeds. Check your actual production target, not just the machine’s top number.
When I’m triaging a rush order for a client who needs 1,000 units in 48 hours (this happened last March, actually), I don’t care about a feature list. I care about one thing: can this machine run at 4,500 SPM consistently for 12 hours without overheating? That’s the benchmark.
2. Verify Stitch Quality on Your Fabric
This step sounds obvious, but many buyers skip it. A machine that sews perfectly on 100% cotton might skip stitches on a polyester lining or a thicker denim. You need to test it with the exact material you’ll be using.
The test: Run a 1-meter seam at three different speeds (slow, medium, max). Look for skipped stitches, puckering, or thread breakage. If the machine can’t handle the fabric at two of the three speeds, it’s not the right choice for you.
I only believed this advice after ignoring it once and eating a $800 mistake. We bought a used machine that looked great because the dealer said it was 'universal.' It couldn't handle our nylon webbing. The 'cheap' price ended up costing 30% more after modifications. Honestly, I still kick myself for not asking for a test run.
3. Check Parts Availability and Service Network
This is the step most people overlook, especially when buying from a new brand. Even the best machine will break down, and when it does, waiting a week for a replacement part costs you far more than the part itself.
What to ask the supplier:
- Are standard parts (feed dogs, bobbin cases, needles) interchangeable with common brands like Juki or Brother? If yes, you can source locally.
- Is there a distributor or service center in your city? If you’re in Egypt or India, for example, check if the brand has support in Cairo or Mumbai.
- What’s the lead time for a motor or a circuit board? If the answer is 'more than 5 days,' that’s a risk.
When I compared two suppliers side by side for a 2024 project—same spec machines, one with local parts and one without—I finally understood why the details matter. The 'cheaper' machine from the non-local supplier would have cost us 40% more in downtime over a year (surprise, surprise). That’s the hidden cost no one talks about.
4. Calculate Total Cost, Not Just the Price Tag
I went back and forth between an established brand and a newer model for two weeks. The established brand offered reliability; the new one offered 25% savings. Ultimately, I chose reliability because the project was too important to risk.
Here’s the calculation you need to do:
- Machine price: $X,XXX
- Shipping and customs (remember, prices vary by country. A "jack sewing machine price egypt" will differ from the FOB price): $Y
- Estimated maintenance cost per year (parts + service): $Z
- Downtime cost per day (lost production): $W
If machine A costs $500 less but has a higher chance of a 2-day downtime (because parts take longer to arrive), it’s probably not the real bargain. In my experience managing rush orders for toB clients over 6 years, the lowest quote has cost us more in 40% of cases.
5. Confirm the Machine’s Fit for Embroidery and Special Applications
Many industrial flat bed machines are just for straight stitching. But if you’re planning to add embroidery later, or if you need a machine that can handle embroidery letters machine attachments, you need to check the arm clearance and the foot lift height.
Key spec to look for: A clearance of at least 12 inches under the arm. If it’s less, you can’t fit a multi-head embroidery attachment or handle bulky items like quilts. Also, check if the machine has a built-in pattern function or if it relies entirely on a computer connection.
One of my biggest regrets: not checking the arm clearance on a machine we bought for a 50-unit rush job. The machine was perfect for regular sewing, but the client’s order required embroidered logos. We had to outsource that part at the last minute, which cost us 25% of the profit. The delay cost our client their trade show placement (ugh).
Final Notes and Common Mistakes
To sum it up:
- Don't buy based on SPM alone. Speed without reliability is just a headache.
- Don't assume all industrial machines are the same. A flat bed machine for denim is different from one for silk.
- Do check whether the brand offers sewing accessories machine options like extra bobbins or presser feet in the box. It saves you time and a second order.
Take it from someone who’s managed dozens of rush orders: the cheapest machine on the initial quote is rarely the cheapest machine after 12 months of running it. Build a buffer of at least 20% in your budget for modifications and extra parts.
Trust me on this one. The time you spend verifying parts availability now will save you an emergency call at midnight later.

Elise Marceau
Elise Marceau is an LED display and digital-signage systems analyst covering LED video walls, modular screens, transparent LED, control processors, and indoor or outdoor signage. She applies IEC 62368-1 safety principles while comparing pixel pitch, luminance, contrast, refresh rate, colour uniformity, viewing angle, ingress protection, power density, module serviceability, and signal redundancy. Her specification guides help integrators, venue operators, retailers, and procurement teams align viewing distance, ambient light, content format, installation access, electrical load, and lifecycle support.