Jack sewing article
How I Vet Industrial Sewing & Embroidery Equipment: A 6-Step Checklist for Admin Buyers
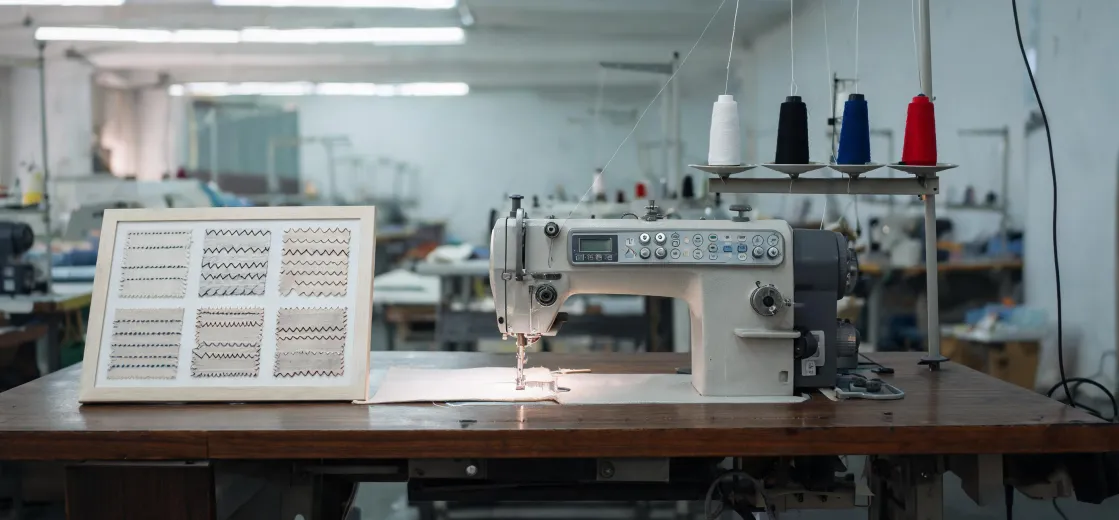
-
Who This Checklist Is For
-
Step 1: Lock Down the Real Usage Profile Before You Look at a Single Machine
-
Step 2: Match Machine Class to Decoration Type
-
Step 3: Verify the Parts and Accessories Supply Chain
-
Step 4: Test the Machine Against Your Actual Material
-
Step 5: Cross-Check the Quote Against Total Landed Cost
-
Step 6: Sign Off Only After a Documented Invoicing and Support Path
-
Common Mistakes I'd Warn Any Admin Buyer About
Who This Checklist Is For
If you're the person who suddenly got handed the job of sourcing industrial sewing machines, an embroidery setup, or parts and accessories for an internal brand apparel project—and you've never spec'd this kind of equipment before—this is for you.
I'm an office administrator for a 320-person company. I manage all indirect procurement—roughly $480K annually across 14 vendors. When our marketing team decided in early 2024 to bring branded apparel production in-house (polos, tees, embroidered hoodies, some denim workwear pieces), the equipment sourcing landed on my desk. I report to both operations and finance.
Below is the 6-step checklist I built after that project. It's not theoretical. It's what I now run every time we evaluate a new machine class or vendor. Total time to run it properly: about 2-3 weeks end to end.
Step 1: Lock Down the Real Usage Profile Before You Look at a Single Machine
Everything I'd read about equipment procurement said to start with a product comparison. In practice, starting with a usage profile first saved way more time.
Before you open any catalog, answer these on one page:
- What garment types? Denim/jeans workwear requires different stitch capability than cotton tees. A jack sewing machine jean spec is not interchangeable with a general-purpose single-needle machine.
- What decoration types? Flat embroidery, beaded embroidery, and t-shirt printing are three separate machine categories—not one machine that does all three well.
- What monthly volume? 50 pieces vs. 500 pieces changes the entire tier of equipment.
- Who operates it? Trained staff vs. rotating office staff changes how much automation you need.
Here's what you need to know: the quoted price on any industrial sewing or embroidery machine is meaningless until you know the output you actually need. I sized our first requirement wrong and it cost us about 3 weeks of rework.
Step 2: Match Machine Class to Decoration Type
This is the step most admin buyers skip because they don't know the categories. Let me rephrase that: if you're buying embroidery equipment without understanding the class difference, you're going to overbuy on one machine and underbuy on another.
The three classes you'll actually be quoted:
- Industrial lockstitch / single-needle machines — for general sewing, jeans, workwear construction. Look for models rated for heavy denim (typically 135×17 or 135×5 needles, 8-10mm presser foot lift).
- Commercial multi-needle embroidery machines — a celeste embroidery machine falls into this tier. You'll see them sold as single-head or multi-head. Single-head at 15-needle count is the entry point for most internal brand programs.
- Specialty decoration — beaded embroidery machine units and t-shirt printing machines (DTG or DTF) are separate purchases. Don't let a vendor bundle them into one quote without itemizing performance specs.
Step 3: Verify the Parts and Accessories Supply Chain
We didn't have a formal spare-parts verification process. It cost us when a bobbin case assembly took 6 weeks to arrive, and our whole embroidery line sat idle.
For any jack sewing tool or accessory package, confirm in writing:
- Standard consumables availability (needles, bobbins, presser feet)
- Lead time on common wear parts (hook assembly, feed dogs, tension units)
- Whether parts are OEM or compatible aftermarket
- Where the parts ship from—regional warehouse vs. factory direct
The third time we hit a parts delay, I finally created a one-page supplier parts sheet. Should have done it after the first delay.
Step 4: Test the Machine Against Your Actual Material
I knew I should send our own fabric samples for a test stitch, but thought 'what are the odds the demo fabric matters?' Well, the odds caught up with me when the first hoodie batch came back with skipped stitches on 400gsm fleece.
Before any PO is signed:
- Send your actual garment material to the vendor for a stitch test
- Request a photo or short video of the output
- Ask for the stitch-per-inch (SPI) setting used
- Confirm thread type compatibility (40wt vs. 60wt poly, for example)
For reference, most uniform and branded apparel programs run 10-12 SPI on woven cotton and 8-10 SPI on knits. Ask the vendor to state the SPI they used in their test.
Step 5: Cross-Check the Quote Against Total Landed Cost
Everything I'd been told said to compare unit price. My experience with 200+ purchase orders suggests unit price is roughly 60% of what you actually pay.
Build a landed cost sheet before you compare vendors:
- Machine base price
- Freight / customs / import handling
- Installation and initial calibration
- Operator training hours
- First-year spare parts kit
- Warranty terms (parts only vs. parts + labor)
Granted, this takes an extra 2 hours per quote. But on a $12K equipment purchase, it's a no-brainer.
Step 6: Sign Off Only After a Documented Invoicing and Support Path
In 2023, I found a great price from a new vendor—about $2,100 cheaper than our regular supplier. Ordered two machines. They couldn't provide a proper commercial invoice (handwritten receipt only). Finance rejected the expense report. I ate the shortfall out of the department budget. Now I verify invoicing capability before placing any order.
Non-negotiables at sign-off:
- Commercial invoice format pre-approved by your finance team
- Named service contact with response SLA in writing
- Warranty terms on the PO, not just the marketing brochure
- Delivery date with a stated late-delivery remedy
If a vendor is on the fence about any of those four, that's a red flag. Take it from someone who learned the hard way.
Common Mistakes I'd Warn Any Admin Buyer About
- Buying embroidery and sewing capability as one package. They're different machines with different throughput. Itemize.
- Skipping the sample stitch test. Demo fabric rarely matches your real production material.
- Not asking where the parts ship from. A $200 part with a 6-week lead time is a $200 part plus 6 weeks of lost production.
- Assuming the sales rep is the service contact. They usually aren't. Get the service name in writing.
- Comparing quotes without landed cost. I've seen a cheaper quote end up costing 18% more after freight and setup.
Personally, I'd rather spend 10 minutes explaining to operations why I need a material sample than deal with a mismatched machine three months later. An informed buyer asks better questions and closes faster. That's the whole point of running the checklist.

Elise Marceau
Elise Marceau is an LED display and digital-signage systems analyst covering LED video walls, modular screens, transparent LED, control processors, and indoor or outdoor signage. She applies IEC 62368-1 safety principles while comparing pixel pitch, luminance, contrast, refresh rate, colour uniformity, viewing angle, ingress protection, power density, module serviceability, and signal redundancy. Her specification guides help integrators, venue operators, retailers, and procurement teams align viewing distance, ambient light, content format, installation access, electrical load, and lifecycle support.